Thursday 20 September 2018

Fastpacking around the Lledr Valley

Sunrise at my wild camping spot
My two day route over the Moelwyns

What is Fastpacking?
Essentially, backpacking… quickly!  Packing the bare essentials to survive for the number of days you are out, and moving efficiently, either walking / jogging or running.  
All the kit I packed / wore
I packed with the intention of covering around 25-40km a day for two days, walking and wild camping overnight in relative comfort.  This meant packing enough warm clothes to keep moving, but if I got too cold or the weather turned horrific, I would accept having to move faster to generate more heat, change course or put my tent up.  My first aid kit was essentially zinc oxide tape and a wound dressing.  In case of an emergency I also had shelter, my poles, phone and power pack, and I was never going to be more than 6km or so from a road or building.
Bog and views across to the Snowdon Horseshoe
The Moelwyns are one of those areas in Snowdonia that around renowned for being boggy, tussocky, hard to navigate through and bereft of visitors.  My route started in Betws Y Coed, travelled along the North and Western side of the Lledr over as many summits as possible, crossed at the top of the Crimea Pass, and returned via the Southern and Eastern side.  As is usual for most of my solo adventures I had a vague route with plenty of alternative ideas!
The view from my last summit of Day 1, Moelwyn Mawr
Day 1, 36.71km, 2255m, 10hrs
A leisurely departure at 11:15am after quite a lot of faff packing.  Today the weather forecast looked good and so despite my later start I knew I could walk until near darkness.  Beginning by following the pathways along the Lledr was beautiful, sunlight shining through the trees, perfectly dry forest tracks and few people.  At Dolwyddelan it is a steady climb until the Ddear Ddu ridge of Moel Siabod.  Pleasant easy scrambling brought me to the high point of my route and from here I undulated along the tops southwards until Cnicht.  I met four people along the way, one of whom I knew which was rather suprising, especially on some random sheep trod in the middle of tussocky nowhere!
Sunset at camp
From Cnicht I had enough daylight to bag one more top, Moelwyn Mawr, before heading North to camp at Llyn Conglog.  I didn’t meet anyone else until lunchtime the following day!
The weather starting to change.  Moel Siabod is in the clouds in the top left of this picture

Day 2, 25.11km, 942m, 7hrs
Walking over one of many summits
An earlier start at 7:15, to make some headway before the rain and fog set in for the day - this didn’t take long.  Plus, it’s always awesome to take in the sunrise when you’re wild camping.  Leaving camp was pleasant, following sheep trods and vague paths over Allt-Fawr and along to Moel Dyrnogydd.  In between the clouds I had amazing views of my route the previous day.  Here, some of the fun stopped.  The descent to the Crimea Pass was essentially steep grassy sheep poo filled tussocks!  The only stile I could find on the other side of the A470 was at the car park, which I thought meant that there would be a path to Moel Farlwyd - the hill on the other side.  How wrong I was!
The Crimea Pass on the A470, and the mountains beyond on the left that I would travel over on Day 2
More sheep poo, rain, fog, tussocks and bog awaited me… and not a trod in sight.  Finally, after an age, I made it to the top.  Heading around to Moel Penamnen was no different; at least by now I had accepted my fate!  Once there though, a path like feature appeared and I had the pleasure of linking up vague paths through thick fog for the next few hours, navigating across the featureless moorland.  
Happy to have finally found a sheep trod to follow, even in the rain
At Y Ro Wen I received some respite, a summit shelter to eat in incredible double track to lead me down to Bwlch Y Groes.  Enjoying walking on a path I then decided to follow the cycleway east onto the forestry tracks to complete my circuit.  Oops.  Despite the recent dry weather the route was still filled with the most horrific knee plus deep muddy bike ruts.  Once committed it was almost as bad to carry on as it was to return and bog bash further north to a right of way that I wasn’t entirely sure existed!  After an age I walked onto drier terrain and had a long plod through the Gwydir Forest.
The track down from the summit of Y Ro Wen
Muddy trails at Bwlch Y Groes

Tuesday 20 March 2018

Mont de L'Arpille - a hidden bad weather ski touring gem

Snowshoe / ski touring trail?  Plenty of fresh tracks left through the trees
On the way to the Chamonix valley from Switzerland there are several good ski tours to enjoy.  Many are classic glacial / steep journeys venturing high into the mountains.  One, just above Martigny, is a classic, gentle, tree covered route with excellent views (although more commonly skied in bad weather!)
The view from Ravoire down the Rhone Valley
After the first hairpin bend on the road towards Chamonix you'll come across a turning to Ravoire.  Take this and follow it towards the village.  Stay on the main road through the houses and shortly after the next two hairpins there is a large parking spot on the LHS.  At 1109m there is a fairly high chance you will have to walk to reach the main snowline.  There are a few parking spaces above the village, but the snow clearing of the roads to reach these seems unreliable.  A public bus also visits Ravoire.
One of the first fields on the way to the Arpille
Following the roads out of the village to the West, either towards La Foret, or further north along the marked snowshoe track.  Soon you will emerge into the more open forest and pass the Chalets de L'Arpille.  The slope is beautifully gentle and steadily gains height.  Even trail breaking seems pleasant!  On a good day you will see the high points ahead of you.
Following the main snowshoe route towards the Chalets de L'Arpille

Mont de L'Arpille in the distance
Past the buildings the terrain steepens slightly.  Head in the same direction curve around point 2052 to a small col.  From here stay roughly on the ridge to the main summit, marked by a signpost at 2085m.
The summit of Mont de L'Arpille
Returning the same way enables plenty of great tree skiing to be had, and in stable conditions you can ski more directly down the East face too.  Yo-yos of the slope generally seem worthwhile between 1400-1600m and the summit, snow dependant.
Mont de L'Aprille at the bottom left, Martigny is the town at the top right from Switzerland Mobility website
I still haven't been there in good weather, but I think I'm going to have to go back just for the views.

Saturday 27 January 2018

Mont Rogneux a classic ski touring peak in the Val de Bagnes

Stunning views of the Petit Combin

At 3084m high, Mont Rogneux sits proudly along the ridge linking Six Blanc at the top of Bruson to the Grand Combin, a 4000er.  It is one of the classic ski touring peaks in the area and can be done in one or two days and from a variety of start / end points.  This makes it skiable for most of the winter season.  If you would like to take two days you can spend the night at the Cabane Brunet.

Views towards Verbier and beyond from the summit of Mont Rogneux

I chose to ski the peak from Loutier via the Cabane Brunet.  This seems to be the most popular way up the peak, although it is also skied from the top of the Bruson ski lifts via the Tete de la Payane, and from the Val D'Entremont to the west.

The Barmasse parking above Loutier and the road to the Cabane Brunet from Switzerland Mobility

The Barmasse parking lot at 1302m sits on the main road to Fionnay just beyond Loutier, it is large enough to accommodate numerous vehicles, and needs to be as the walk to the Cabane Brunet is a popular outing in its own right.

A multitude of ski touring possibilities within a short walk from the Cabane Brunet

From the parking there is a road heading west towards Le Tongne which is normally pisted by the hut, and you can follow this the entire way.  It is about 800m vertical from here to the Cabane Brunet and is well signposted.  If you want a slightly steeper and quicker variant, after around 1km of skinning there is a summer track that heads south up the hill (and is signposted for ascending only).  The track has a pleasant gradient and makes for a more interesting route to the mountain hut, unless you want to chat with friends, in which case the road would work best.

Smiling skimo selfie

Most people will take around 1.5 - 3 hours to reach Brunet where the hut guardian will happily serve you a hearty lunch, coffee, or on a Wednesday evening, cheese fondue.  And for a lot of folk, this will be the high point of their day out, returning via the fields or the road depending on snow conditions.

Cabane Brunet

However, if you're hungry for another 1000m of ski touring and the possibility of peaks and untouched snow, Mont Rogneux is most peoples next target.

Mont Rogneux from the Cabane Brunet from Switzerland Mobility

From the hut head SW across gentle slopes for a few km, the route is pleasantly angled with hardly any steep slopes around or above you until the final summit push itself.  Eventually you will end up on the NE ridge which starts pleasantly and then continues more steeply.  If snow conditions are good you will be able to skin the entire way to the summit, but you might need ski crampons and given the dots on the map at times you may need to walk to the top with crampons and an ice axe.

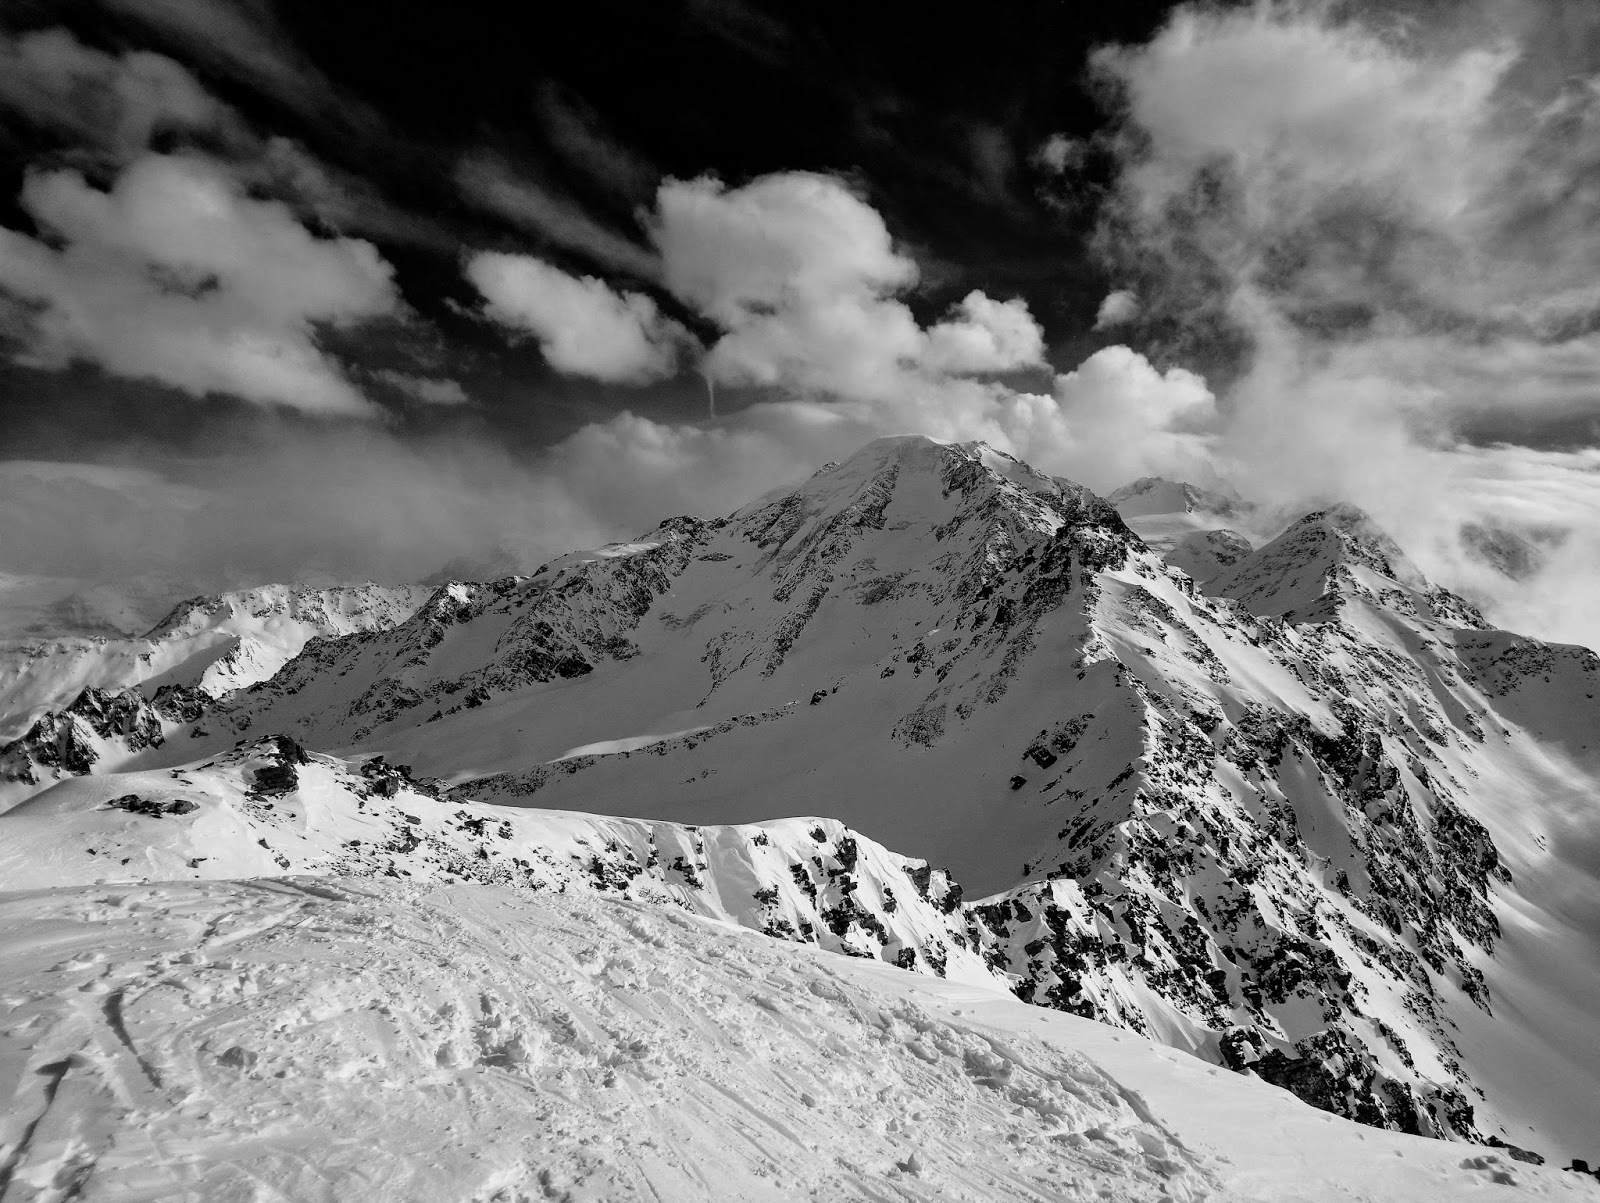
The summit of Mont Rogneux looking very snowy

Once on the summit there are a multitude of options in descent from the steep and committing to the gentle.  You can also ski on nearly any aspect and still return to the Cabane Brunet.  This means that you can generally find some good and safe snow to ski, grab a coffee on your way down and follow the road to the bottom if conditions aren't great lower down. 

Exploring the Alps, it's always good to see a sign post that confirms your navigation!

This route took five hours, four to go up and one to return.  And I can see why it's so popular.  I'll definitely be back.

Powder turns from summit to the Cabane Brunet

Saturday 20 January 2018

Dynafit Feline trail running shoes review

Every now and then I come across a piece of gear that I think is so good I can't help talking incessantly about it and recommending it to everyone I come across!  Therefore on my blog I will be reviewing the odd piece of outdoor equipment that I really like.  These shoes fit the bill perfectly.

Trail running in Snowdonia

What trail running shoes did I use before?
When I first started trail running I just used some Saucony road trainers, then I bought some Salomon Speedcross which meant I could actually run (and not slip over) on grass and mud.  After a couple of pairs of these I switched to the Inov-8 Roclite which increased my grip on rocky terrain in addition to having a good enough tread to cope with grass and mud.

Winter running with Kahtoola crampons on

Why did I buy these shoes?
If you've never heard of Dynafit, don't worry, unless you are a ski tourer I'll forgive you!  They are relatively new to the running world, particularly in the UK.  However their ski equipment and clothing is highly functional and well regarded, especially in the ski mountaineering racing world.  So, when I saw they were making trail running shoes I had to have a look.

Loving these shoes
Highlights

1: The Sole
The sole (and their reputation as a gear company) was the sole (excuse the pun!) reason I bought my first pair of Dynafit Feline running shoes.  They were made of Vibram rubber and had a tread in a similar pattern to that of the Salomon Speedcross.  Therefore I expected them to race down muddy hillsides but also stick to rocky scrambles.  Just what you need when the UK mountains are your trail running playground.

Dynafit Feline Vibram sole
2: Fit
The fit feels snug, stable and precise.  This has allowed me to take the shoe on graded scrambles in addition to running over uneven terrain with ease.  I have also worn them for multi-day backpacking trips without any problems.

Enjoying the shoes in the Scottish Highlands

Lowlights
To be honest I struggled to find any real lowlights, the ones below are me being a bit picky.

1: Price
They are pricey, as are most high end trail running shoes, currently £110.  

2: Lacing system
It works, is quick and easy to use but not quite as good as Salomon's, as the pocket for the laces is on the side not in the middle of the tongue.

Cold feet in the snow, these aren't really made for winter runs
Click here to view them on the Dynafit website